
Showing posts with label stampinjul. Show all posts
Showing posts with label stampinjul. Show all posts
Wednesday, August 5, 2020
Saturday, April 1, 2017
We Create Blog Hop--In Color Farewell

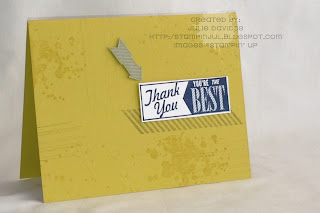
It's hard to believe that a new Stampin' Up! Catalog is just a couple months away...which means new In Colors coming! YAY! It also means old In Colors are leaving us--BOO! I decided to use our soon-to-be-retiring 2015-2017 In Colors on my card today. I think my favorite is Mint Macaron followed by Delightful Dijon. Which ones were your favorites?
I got my card idea from a very talented demonstrator, Jackie Bolhuis. I loved how she used the bar stamp from Thoughtful Banners to make a simple pattern and then added the words in Basic Black for contrast. My basic card uses just the '15-'17 In Colors (I decorated the envelope as well) and one of the many versitile phrases in this stamp set. The stepped-up version added Basic Black metallic thread and black sequin hearts from the Metallics sequin assortment.


Enjoy the rest of the blog hop!!
Julie

Saturday, August 1, 2015
We Create Blog Hop--Step it Up!

We have decided that our readers would probably appreciate something different, so we will be doing "step it up" posts for the remainder of this year's blog hop posts. We will all be creating a simple card or project and then step it up by adding a few more details. We hope that will get your juices flowing.
Today's card is the one I made for this years Stampin' Up! North American Convention. I usually don't make a lot of swap cards, but I was asked by my friend Jeanna to join an "organized swap" which is one that is planned ahead with a set amount of people. We met at Red Rock Brewery for some yummy dinner and passed our swaps around the table. It's always fun to meet new people and share some great ideas.


Convention was so much fun, but it has come to an end in more ways than one! Stampin' Up! has decided to change the way they gather with all the demonstrators throughout the world and as the company grows, change is inevitable. I'm anxious to see the new directions SU! is taking, I'm sure it will be a blast!
Time to see what the rest of the "hop girls" have to share! I'm sure it will be great!
Hope your weekend is filled with some creativity!
Julie
Wednesday, July 1, 2015
Summertime!

I thumbed through the new DSP paper pack called Cherry On Top--how darling it that? There are beautifully-colored patterns that are just perfect for celebrations. I used a returning favorite Endless Birthday Wishes and my go-to Framelit Chalk Talk as well as the Ovals Collection for the scalloped edge. My little tag has a fun cupcake I made with the Cupcake Builder punch and the 1" circle punch. Doesn't it look good enough to eat? Ok, I really need to get to bed, but don't forget to visit all the other bloggers to see the fun they've created!
Make sure you check out the new catalog if you haven't seen it yet and you should follow me on Instagram (Stampinjul) and or Twitter (@stampinjul) if you want to see some of the fun happenings at this last convention! Both links are on the right side of my blog! See you soon!
Julie
Saturday, September 14, 2013
Happy One Year Blog Anniversary...Yesterday!
I was so busy with my girl's trip this weekend that I forgot that my blog celebrated it's first anniversary! It's been a fun ride so far and I hope that you will stay with me as we keep learning, growing and creating together! I'll be posting more about my girl's weekend on Monday, so check back in then. Right now, it's time for me to go to bed--I'm running on little sleep and having a hard time keeping my eyes open!


Hope you all have a wonderful weekend!
Julie
Saturday, August 31, 2013
Blog Hop--Case that Pin


I used my Regals designer buttons instead of the vintage clear buttons Amy used. I love the way the buttons coordinate with the colors I used on the card even though they don't exactly match. I finished it off with a tag with "friend" from Fabulous Phrases stamped and embossed with silver embossing powder, the Chevron embossing folder, and some Baker's Twine.
Hippity hop over to visit the rest of the bloggers. Show them some love by leaving a short comment--it's nice to know that people appreciate our work!
September is here, cooler weather is just around the corner! I'm thrilled!
Julie
Thursday, August 29, 2013
MDS Blog hop--Polka dot card


I love graphic patterns like this so I can't wait to have this printed off. I also LOVE these colors together! Most of what I used on this card were punches, but I also used the Hip and Handsome and Natural Composition overlays (my fav) and the Fantabulous You stamp for the greeting.
Now it's time to go check out all the other lovely projects by my MDS friends! Remember, we love comments!!!
InLinkz.com
It's hard to believe that August is almost over! Wow, the year has flown by! Ready for Fall!
Julie
It's hard to believe that August is almost over! Wow, the year has flown by! Ready for Fall!
Julie
Sunday, August 11, 2013
Never too early...
...to start thinking of Halloween, right? I figure since the stores are already putting out their Halloween decorations, so can I! This is one of the sets I received at convention called Tags 4 You and you can get it with a bundle that comes with the stamp set at the coordinating punch for only $26.95 for the clear mount stamps, that's a savings of 15% over buying them separately!


I hope you can see that I embossed the stamp using black embossing powder and added the Basic Rhinestone Jewels which I colored with a black Sharpie marker. The background is all done with Gorgeous Grunge. I punched a small circle of Glimmer paper and glued it behind the Vintage Faceted designer button.

I took some White Baker's twine and colored it with the Old Olive marker then I lightly misted it with water so that the color saturated the twine--that is a fun way to get colors to coordinate with your project.

Are you ready for Halloween? It's just around the corner!
Julie
Friday, August 9, 2013
Undefined Card-Take 2
Just a quick card today with my favorite Gorgeous Grunge and Undefined carved stamp. I also added the "XOXO" from the new Oh Goodie set from the Holiday Catalog. I used the Chalk Talk Framelits, but I shortened the tag by sliding the tag down a bit in the Framelit after the first cut and then running it through again. I used clear embossing powder on the Melon Mambo classic ink and sprayed the whole thing with Smooch Spritz. I hope to have a few more projects using my zebra print soon, so check back! This has been a lot of fun, I can't wait for my whole kit to come!

Do something crafty this weekend!!!
Julie

Do something crafty this weekend!!!
Julie
Thursday, August 8, 2013
Gorgeous Grunge
I LOVE this stamp set! I've already used it in several projects already and I know that it's going to be the "GO TO" set for me! Here's a card I did several weeks ago:
 I stamped the "Thank You" and arrow stamp from Hello, Lovely in Midnight Muse and Summer Starfruit and then stamped with my Gorgeous Grunge in Summer Starfruit on the same color card stock for a tone on tone look. The little arrow (in Soft Slate) was cut out using the Paper Snips (don't you just love those little scissors??) and mounted with Stampin' Dimensionals. Some people love Summer Starfruit and some don't--I think it's a beautiful color and I use it a lot! I will hate to see it go next year, so I will be using it as much as I can! I hope you are enjoying the last few weeks of your summer! My baby starts her senior year of high school in a few weeks--I'M NOT READY!! This is going to be crazy! I'm just going to enjoy the ride!
Julie

Julie
Saturday, August 3, 2013
Paper Pumpkin--Get it NOW!

Julie
Friday, August 2, 2013
2013 Holiday Catalog

It's overflowing with stamps, paper, bundles, kits, gifts and more! Check out this fun bow die for the Big Shot die-cutting machine:

Julie
Wednesday, July 31, 2013
Blog hop--The Great Outdoors

I used my punches that I had created in MDS with the punch editor, and I came up with this card:


When I print this off I will leave off the button and add a real Designer button in Melon Mambo and maybe even some rhinestones or Dazzling Details glitter for some bling! I'm thinking this card can be used for so many different occasions--I better print a handful of them!
Make sure you stop by the rest of the blog hoppers, too! Share with your friends!
Today is also the first day of the Holiday Catalog, there are so many new seasonal stamps, papers, kits, gifts and more! Check it all out!
Julie
Look at those Dimples!
My cousin and his family moved to Vegas about 6 years after we did and it was nice to have more family here in town. They only had one little girl at the time, and since then have added 4 more darling children to their family--and I adore each one! One day when we were attending the baby blessing of their youngest child, the next youngest, Sarah, age 2, seemed in need of a little attention! I saw her sitting over in the corner by her grandma being shy and quiet but when I started talking to her, her eyes twinkled and as the huge smile formed on her face I noticed her dimples! Not just regular dimples...deep, perfect dimples! Every time this little girl smiles her dimples seem to sink all the way through her cheeks! I got my camera out and started taking pictures and she just lit up! She hammed it up for the camera for at least a few minutes before she got bored and wanted to play with all her cousins. I got a few good photos, but this was the one with the twinkle in her beautiful eyes! She is such a flirt--even now almost 4 years later!
 I used Hip and Handsome overlay for the background; Twitterpated ribbon (recolored), two-toned ribbon (recolored), pom-pom trim (recolored), crochet trim, seam binding (recolored), baker's twine; Antique brads and staples. My colors were matched with the color of the couch in the background (I love that option!!). This was such a fun page to create! That's it for my Artisan contest scrapbook entries, but come back tomorrow for the CREATE blog hop! I'll post more Artisan contest entries soon!
Julie

Julie
Tuesday, July 30, 2013
New! Undefined
While I was at Stampin' Up!'s convention a few weeks ago, they announced a new product...Undefined, a stamp carving kit that allows you to use your own creativity to make your own stamps! At first I was a bit skeptical. Why would you want to carve your own stamps when they have so many wonderful stamps in the catalog? But then I saw all the fun stamps that demonstrators were coming up with and a lightbulb went off!!! WOW! This is really a fun new way to express your creativity, even if you don't think you have any artistic ability! Watch this quick video that describes what Undefined is all about.
The thing I like most about Undefined is that it doesn't have to be perfect! In fact, that's what makes it so great! The slight imperfections on something that is handmade is what makes it original, one of a kind! I decided to try out my stamp that all the demonstrators got at convention, I didn't have time to go to the Undefined station to make mine, so I made it at my friend Jeanna's house (she had the new kit with all the tools!) My suggestion is to read the directions and if you don't feel comfortable free handing your design, use the included templates or other design to start out with. Also, don't start out with a very intricate design either!! (I had to start over!) I decided to do an animal print, zebra to be exact, and I just free handed lines and spots and colored in the areas I wanted to cut out. It came out much better than I thought it would! Ta-da!!!
 Now I think I'm ready to get the whole kit! If you are interested in getting this kit, you can purchase it on my website anytime! Stamping is generally a female dominated craft, but what man doesn't like to use a tool to create something?! Make sure you check out the Pinterest board Stampin' Up! started to showcase some of the wonderful creations demonstrators and customers are coming up with, they are ah-may-zing!!!
Keep creating!!
Julie

Keep creating!!
Julie
Monday, July 29, 2013
Sweet Smile
I've been a scrapbooker for more than 20 years, so switching to digital scrapbooking was a little out of my comfort zone, to say the least! I loved using MDS for cards and home decor, but scrapping with it was another story! It sounds pretty funny now, but my mind just has a problem translating on a spatial level I think. I'm feeling a little more comfortable now that I have jumped in with both feet, but it's still a work in progress!! Anyway, here's another Artisan contest entry. This one is of my daughter and my niece. I am not a great photographer, I don't even have a really good camera, but I caught this darling smile on my two week old niece's face--I will call it a smile no matter what anyone else says!!


I used Twitterpated DSP and filled the punch I created in MDS, I think I called it "trapezoid". I also created the flower punch, filled it with Baja Breeze and then used the crop tool to crop the shape of the flower in the Naturals Composition overlay stamp. I used the freeform line tool to make my stitched heart and finally, I cropped a small section of stitching, recolored it and enlarged it. Background was also Naturals Composition overlay cropped into plank sizes. Check out my YouTube videos on cropping stamps and editing punches. Try our 30-day free trial for MDS or purchase MDS for only $19.95!
I hope you are enjoying your summer! Stay cool!
Julie
Tuesday, July 16, 2013
Ready, Set....GO!!
I'm just finishing all my last minute stuff before I leave for convention! Yay! I thought I would post this card I made at my friend Jeanna's a few weeks ago. It uses Hello, Lovely stamp set, the 1 inch square punch, clear embossing powder and the Decorative Label punch. I took some Basic Gray 1/4 inch stitched grosgrain ribbon and I pulled the center stitching to gather the ribbon (make sure you glue or knot the end) and wrapped it around the card. Lastly, I added a Vintage Faceted designer button for some "pretty"! The hardest part about this card is that you probably need to use the Stamp-a-ma-jig to line up the embossed images after you attach your squares. It's more time consuming, but it still only took me about 20 minutes to make.

 Make sure you follow me on Facebook, Twitter and Instagram this week (links on the right)--I'll be posting fun photos and excitement from Stampin' Up! Convention in Salt Lake City!
Today is also Download Tuesday for MDS, so make sure you check out the fun new downloads this week!
Julie

Today is also Download Tuesday for MDS, so make sure you check out the fun new downloads this week!
Julie
Friday, July 12, 2013
One More Week...
...Until Stampin' Up! Convention!! I'm so excited! In the almost 17 years I've been a demonstrator, I've attended 16 conventions! I only missed the Denver convention because I had just had surgery (and truth be told, I still planned to go, but my husband told me to rest!) Anyway, I so enjoy being around all the demonstrators every year--their excitement, their talent, their friendships, it is all completely breathtaking! New friendships are made; happy tears are shed; craziness ensues; ideas are shared; knowledge is gained; more craziness ensues; {PRIZE PATROL}; lots of laughter; photos, photos and more photos; even more craziness ensues; {PRIZE PATROL}; sleep-deprived silliness; lots of swapping; screaming, jumping up and down craziness ensues; {PRIZE PATROL}!!! There, doesn't that sound like fun? I am so excited that it's hard for me to even concentrate on anything else for very long--I think it's called "convention brain". My family is pretty much used to it by now, but being compounded with my recent "brain fog", I'm sure it's driving them crazy! Maybe I'll be back to normal in a few weeks...maybe not!!!
I have a few projects to post before I leave, so hopefully my "convention brain" will let me focus for a bit on blogging! Here is my submission for MDS Monday 21:
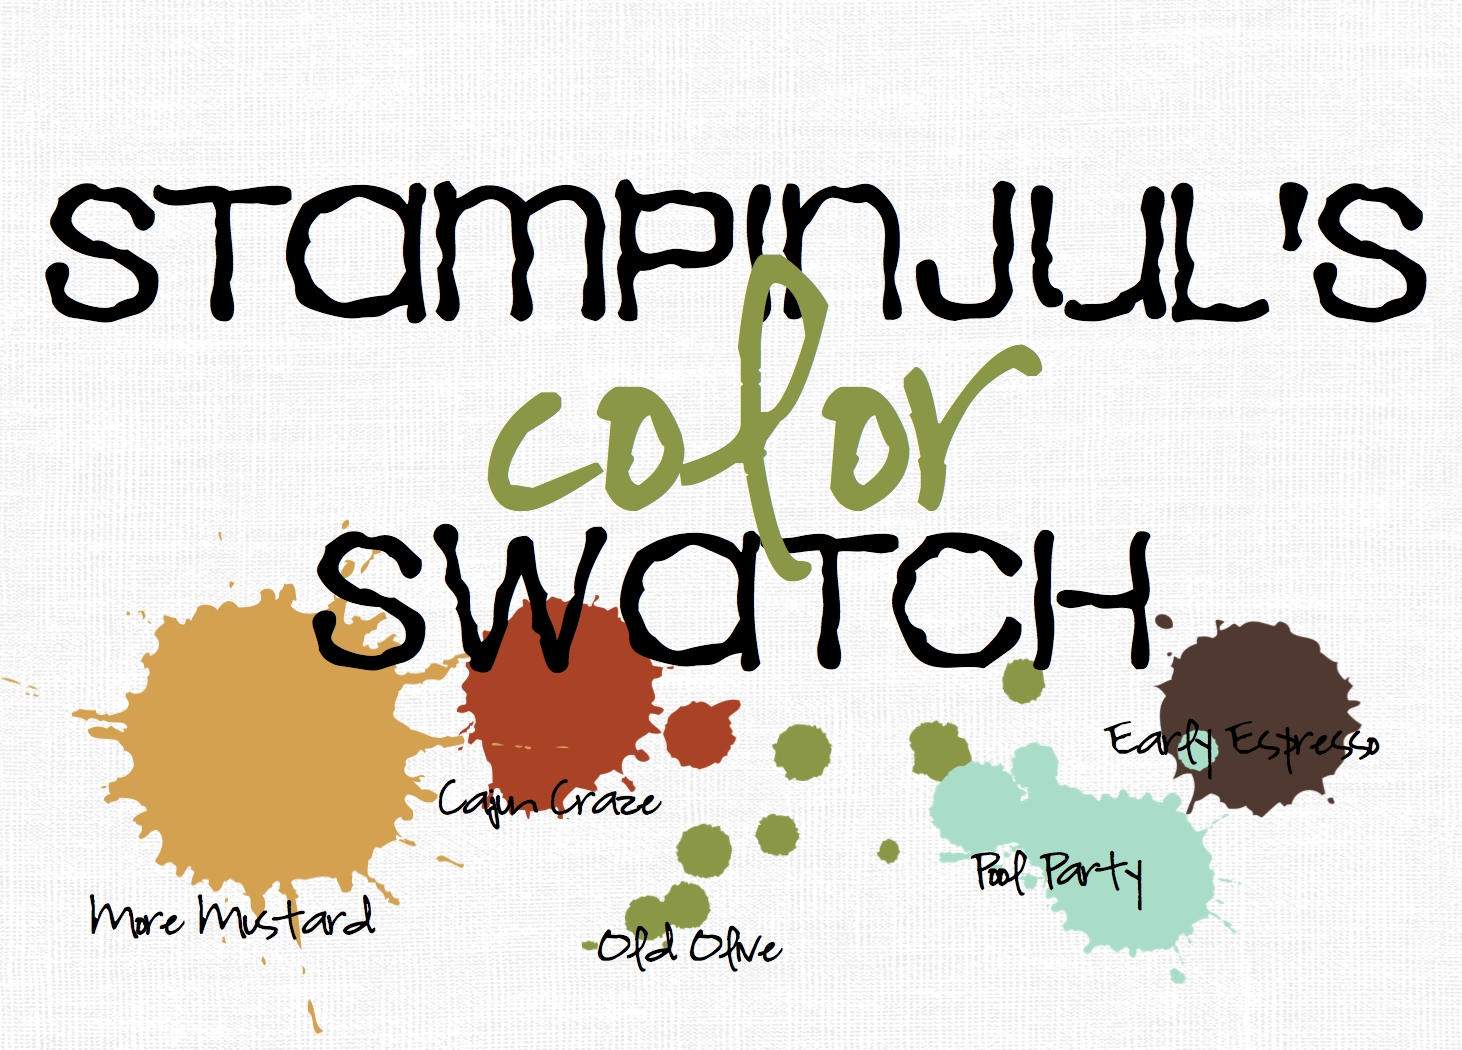
 I had taken some panorama photos on a drive up through the Red Rock Loop and I thought that they would be perfect for this technique. If you would like to see how this is done, you can check out my photo grouping video here. This image of the storm is so stunning that I didn't want to add too much, just a few elements with colors practically taken from the landscape. I browsed through the MDS color combo tool and found one that was perfect for this page and with the recolor tool I could change all of my elements to coordinate with that color combination. Here's my color swatch for this page:

I have a few projects to post before I leave, so hopefully my "convention brain" will let me focus for a bit on blogging! Here is my submission for MDS Monday 21:

Almost all of the elements on this page are from the Be Yourself May kit and were recolored.
I've got to hurry and get my swap cards finished and some shopping done before I leave, but check back, I'll have a few more projects for you before I leave!
Julie
Subscribe to:
Posts (Atom)